Solar With Air Gap
I installed 550W of flexible solar panels on our Winnebago Outlook and they worked fine. However – everybody talks about air gaps nowadays – with the idea that some distance between the flexible panel and the roof not only prolongs the life of the panel, but also decreases the temperature and therefore increases the efficiency of those panels. This sounded logical to me.
I had planned to add a few more panels to my solar array on the roof anyway. So I took the time to first remove the old, Eternabond taped panels from the roof. That was quite a job, but after a little while I found the perfect method to get the Eternabond .. well .. unbonded. Just use a metal scraper, heat it up with a heat gun, hold it at an angle of about 60 degrees and scrape away. If done correctly, with the scraper nice and toasty, you should get about 90 percent of the gooey stuff removed. The rest (and it should be just a hint of stickiness remaining) can be scrubbed off with gasoline and some old rags.
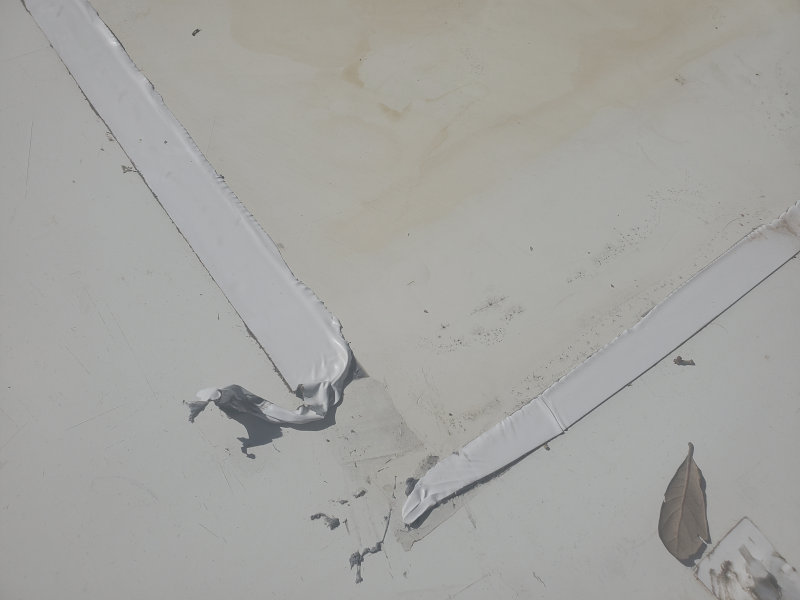
There’s almost no residue left.
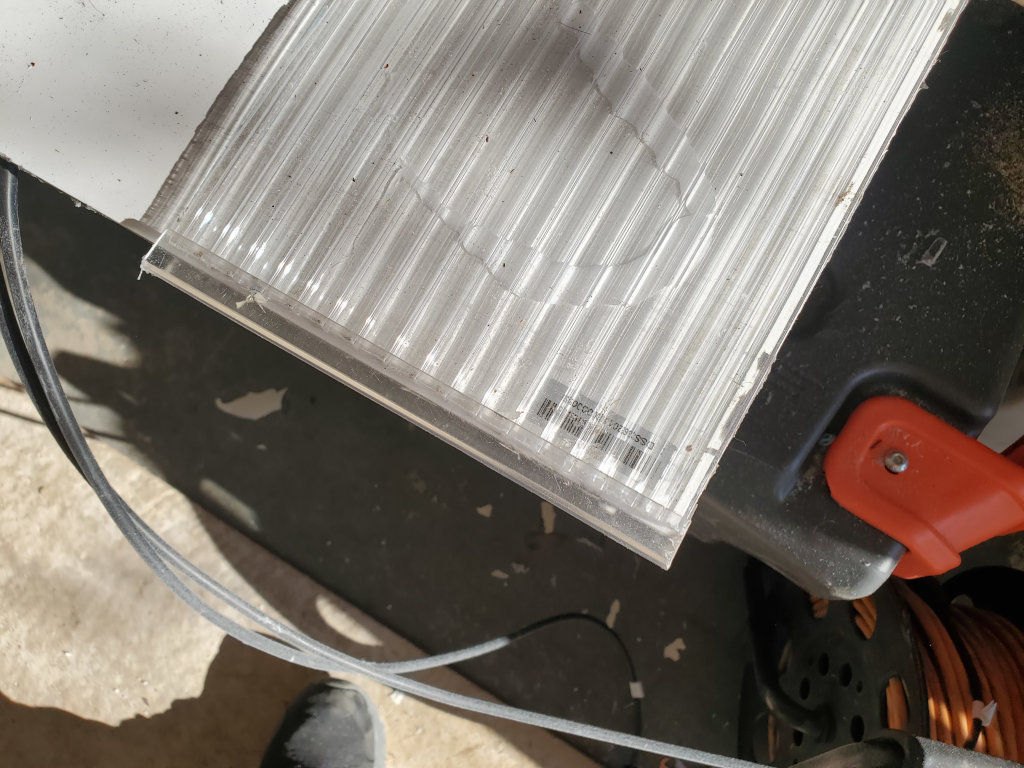
Now – there are a few “schools” on how to make an air-gap for the solar panels. I decided to use corrugated poly-carbonate sheets. There is a video on Youtube (RV with Tito) who describes the process, but I wasn’t able to source the parts he used – particularly Poly Carbonate sheets with the air channels going from left to right. All I could get was material with the air channels going top to bottom – and that created the need for some creative thinking.
Because its not only the air gap, you also want to allow the air under the panels to be able to circulate. In other words: You need some openings to let air in and out.
I finally found a way to do it.
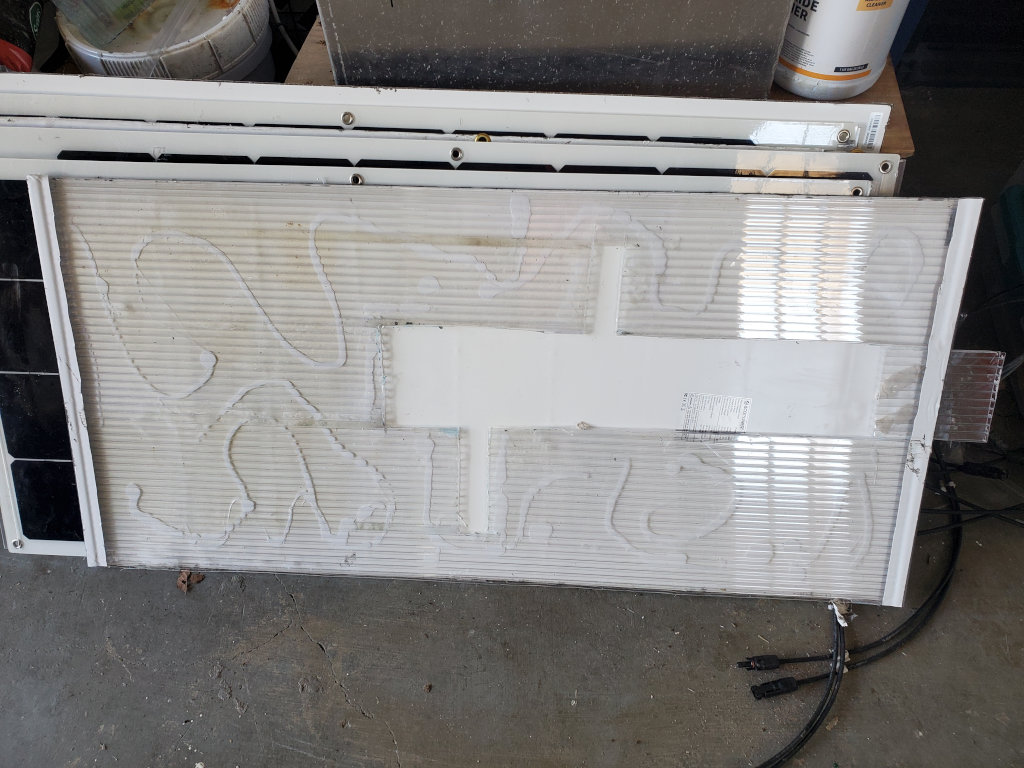
We have a large cut out in the center (more or less) of the poly carbonate sheet and two side cuts allowing the air from the individual channels to get out. The back of a channel has a piece of poly-carbonate sticking out which allows you to glue the panel back down but in a way that allows air to escape.
The front and back are secured with a clear plastic strip. I left a little distance so that the air can circulate easily from the front and the back – even if taped down again (just leave the openings at the corners of the panel) .
I couldn’t get the exact same type of new panels, but I was able to get a very good price on Sunpower panels – and those panels have mounting holes. My old panels did not. Just to test it, I drilled 6 holes in one of my old panels and secured them with grommets. Now I was able to mount 4 panels with T-tracks (as suggested by RV with Tito), the others were taped back down with Eternabond. Since each of the panels are combined into a separate power circuit, I will be able to see if one method is more energy efficient compared to the other.
I split the solar panels in two groups because I wanted to use the smallest (in term of size) MPPT controllers. I just didn’t have a lot of room available in my electric compartment. I decided to go with two Victron SmartSolar MPPT 100 I 30 because they are small, use Bluetooth for configuration and monitoring and they match my solar design perfectly. I wired the panels in 2S2P configuration with two panels in series and in parallel with the other two panels in series to create one leg to go to one controller. That’s around 40V with about 10 Amps when the sun shines nicely. I didn’t increase the voltage because I wanted to stay away from voltages that may be lethal or cause an arcing problem. 40V just suits me fine.
Of course I now had to run two pairs of wired down the fridge exhaust and down into the electronics compartment. The only real problem was to clamp down the cables in the fridge exhaust so that they are as far away from anything that might be hot. The fridge vent is narrow and there’s really not a lot of room to work in.

So – that’s it for the time being. The new solar system works fine. It’s the beginning of April in South Texas and I am seeing about 45A charging current (620W). We’ll see how those panels hold up in the summer.
I bought the poly-carbonate sheets and the clear plastic strip from the Home Depot. The t-rails were ordered from Amazon.
Again I am impressed with all your work. We hope your doing well in your new home. We hope we see you again someday. This next summer we will be in Washington state all summer. Maybe summer after next I will attempt the solar install. I need to save a little more$ LOL Peace