Going Lithium and Solar
Part I of our conversion to Lithium and solar. We are replacing our old lead-acid batteries with LiFePo4 batteries and install all the necessary converters and chargers.
Most motor homes are perfectly suited to go from campground to campground and it’s perfectly ok to enjoy a day without hookups. After all there’s a generator to run anything from the air condition to the microwave.
This is a long blog post, so you can jump to the parts you are interested in.
- Intro
- Installing the DC to DC converter
- Installing the Renogy Battery Monitor
- Installing the Progressive Dynamics PD9145ALV 12V Converter/Charger
- Final thoughts
Chapter 1: Intro, Overview
Not too long ago we discovered “boondocking” – that is spending a long time, a few days, a week or even a month somewhere without access to a power plug or anything else for this matter. Running a generator uses a lot of gasoline (or Diesel) and the noise and the fumes take all the fun out of enjoying the nature around you. But thankfully, technology has progressed to the point where we can use modern ways to provide almost all of our energy needs without burning gasoline.

We invested a lot of effort and time to understand the differences of Lithium vs. Lead Acid, how to link solar into the mix, about the advantages and disadvantages. Maybe this blog will help you with your research.
Let’s look into Lithium batteries first. Within this blog, we’re only talking LiFePo4 – which are Lithium Iron Phosphate which is currently the safest Lithium technology available.
In a normal setup, the house batteries are charged by shore power or the generator via the converter/charger, but also by the alternator from your rig’s engine.
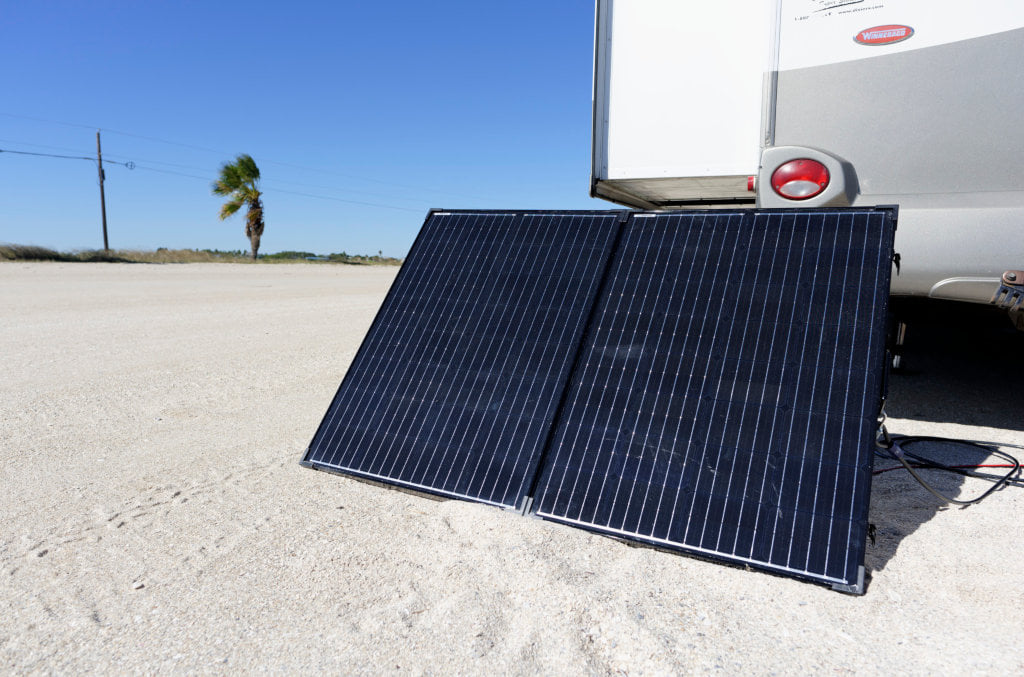
Our rig came with two 12V 100Ah lead-acid batteries (not even deep-cycle) and a puny little 30A charger. Needless to say – this setup doesn’t provide a lot of power and it takes forever to charge. We replaced the charger with a 45A 3-stage charger (which required to run a 6 gauge wire to the battery disconnect in order to upgrade the breaker from 40A to 60A). We also added a portable 200W Renogy solar panel with PWM controller.
We also added a 1200W inverter and an automatic transfer switch (to automatically connect/disconnect the inverter) when connected or disconnected to/from shore power.
Prices:
45 Amp Kit For 6300 Series $200
200 W Renogy Mobile Solar with charger $380
Inverter, 1200W $180
Transfer Switch $90
Fuses, wires, miscellaneous $100
So .. for about $1,000 we had 120V in the house to run our television, Kodi entertainment center, the laptop chargers and other items. The inverter could power the coffee maker even the microwave, but the lead-acid batteries are simply not up to the challenge – though it did work for a few minutes. You can even skip the 45 Amp kit if you go directly to Lithium. We didn’t know that much when we started our boondocking experience and now have a perfectly fine, almost new “45 Amp Kit For 6300 Series” .. anybody interested?
The solar panel pushed between 8Ah and 12Ah for 7 hours to 8 hours back into the batteries under clear skies. This setup allowed us to spend a week at the beach, running the generator occasionally for ½ hour to run the microwave (and refreshing the batteries) while the solar would provide most of the charge. But around bed time the batteries would sit at around 12V which indicates there’s not too much in them anymore. And it was perfect solar weather. With just a few clouds more, we would have had to rely on the generator – which is not what we want.
Old style lead-acid batteries have different charging cycles and can only take a limited amount of current at a time and even this depends on the charging cycle the batteries are in. If you have 40A from your solar, but the battery is at around 75% full, the charger may only put 5A back into the battery. In other words: you have 35A wasted.
Lithiums on the other hand take pretty much any current you throw at them, the internal Battery Management System (BMS) of modern LiFePo4 batteries provides the safety mechanisms to disconnect the cells if it is full or otherwise can’t handle the current. But they easily take 50A charging current, some even 100A or more.
In order to recharge completely empty (and yes: you can safely pull each and every Amp-hour from a lithium battery) 100Ah takes only about 2 ½ hours of clear skies (with a 500W solar array) or two hours of generator/shore power charging. With lead-acid it may take up to 3 or 4 times longer or even more.
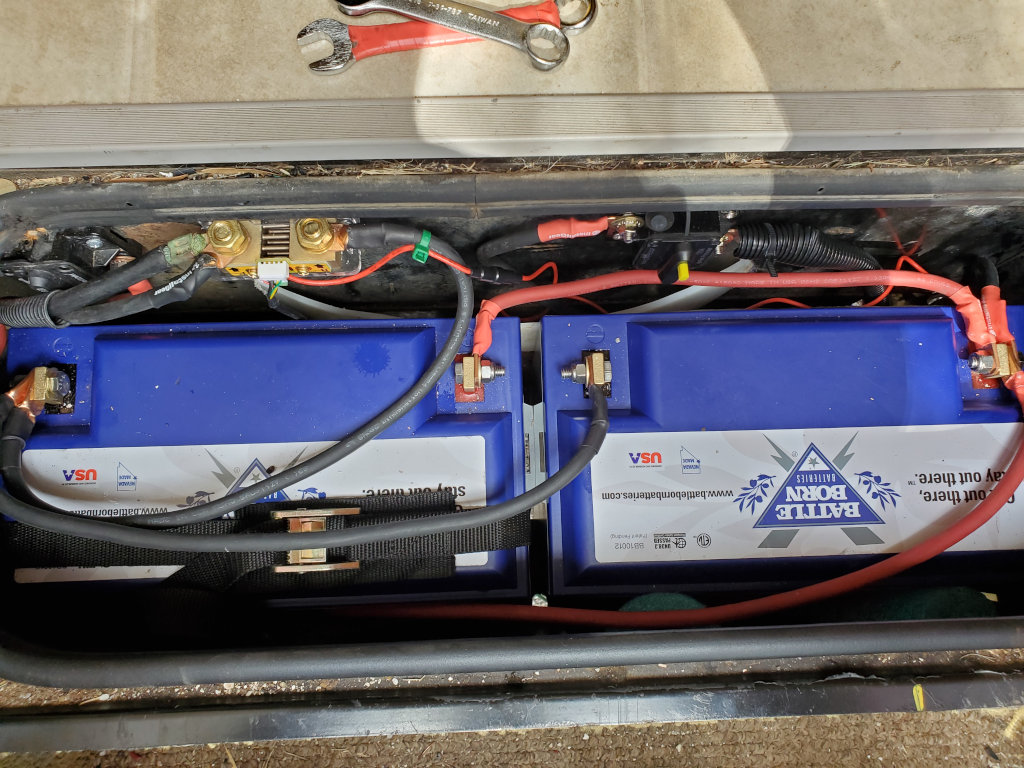
So we bought two “Battle Borne” 100Ah LiFePo4 batteries. Now – those batteries are among the more expensive batteries available. Why did we spend that much money?
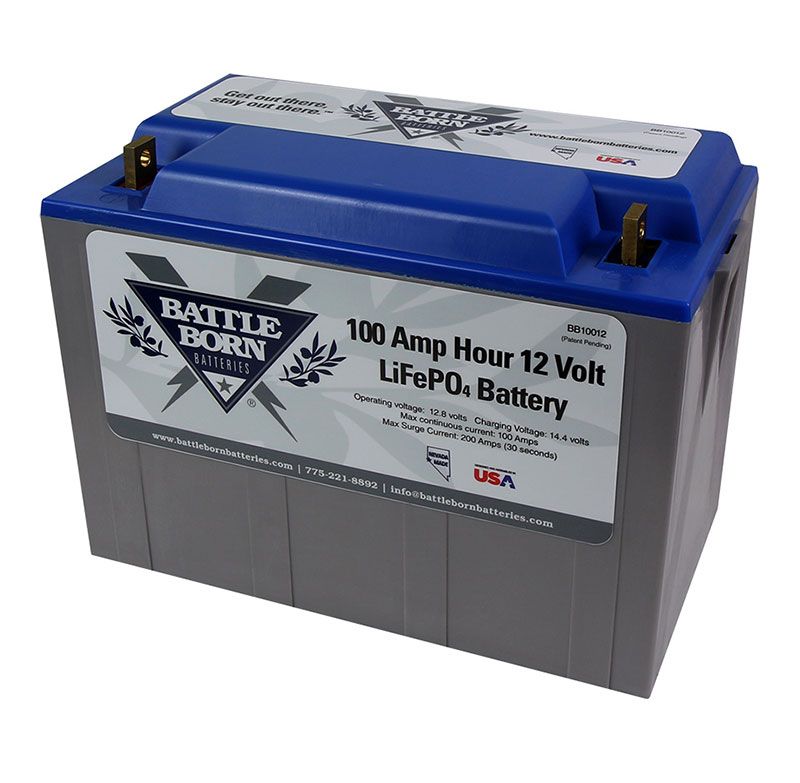
Well – a lot of RVers use “Battle Borne” batteries. That of course had some influence on our decision. They have a knowledgeable and responsive customer support, they shaved a few percent of the purchase price and they have a 10 year warranty. They are splash-water safe and can indeed be placed in the space now occupied by our lead-acid clunkers.
But I did ask the tech support about the inner workings of their batteries. They don’t use prismatic cells, but cylindrical cells. Which pretty much means that if a cell fails, the battery will continue to work with some capacity loss. Other batteries like SOK batteries use large prismatic cells. If one prismatic cell fails, the whole battery pack will be dead. I also thought about the AmpereTime 200Ah battery but again – if something goes wrong, e.g. with the battery management system, you have no power at all. Zip. And their tech support couldn’t even answer how they would handle the 5 year warranty in case something happens. In the end we just played it save. Yes – we could have saved a few hundred dollars on the battery, but I like the idea of 10 years warranty provided by somebody I can talk to at a moments notice.
Now – that our Lithiums are on the way, let’s talk about the other things we need. As mentioned before, every motor home has at least two different methods of charging the batteries. Shore power/generator and the engines alternator. While you can continue to use your old technology, you won’t get the full capacity into or out of the Lithiums. Lithiums (with integrated BMS) want to be charged at around 14.6 V – but the alternator doesn’t deliver this voltage. The charge/controller (if for lead-acid) will provide the required voltage, but only in bulk mode. Once a certain voltage is achieved, it will go down to about 13.5 V . Some controller/chargers can be overridden by a little button to put them manually into bulk, absorption or float. So – you can manually put the charger/controller into bulk and it will push the Amps into your Lithiums until the battery internal BMS disconnects the battery when full.
But to play it safe, you’ll need a Lithium capable converter/charger and a DC to DC that converts the alternator’s voltage into something Lithium compatible. Thankfully, both devices are not particularly expensive.
You should get both for around $400.
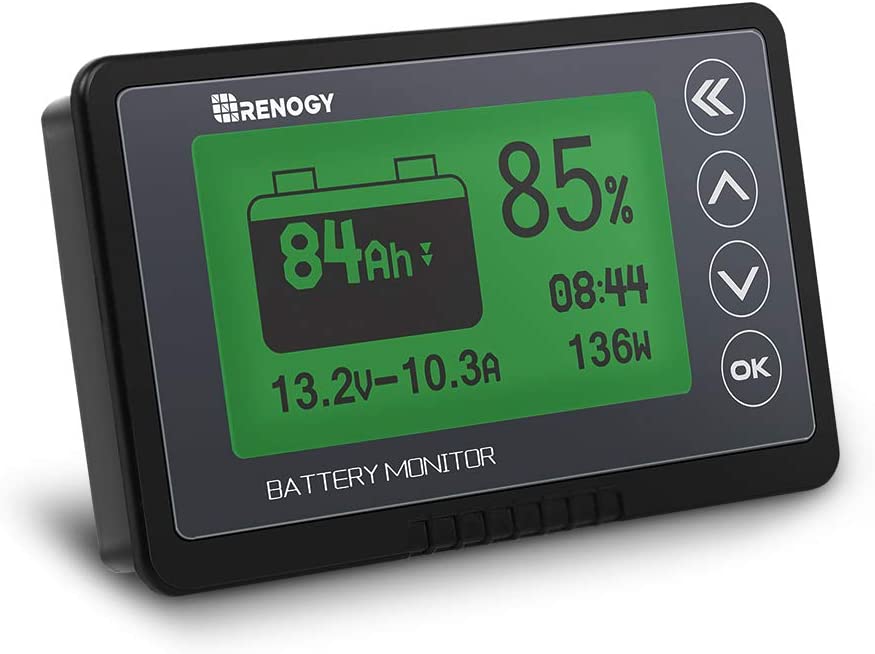
In order to see what’s going on with your batteries, you’ll also need a battery monitor. This unit should give you an idea of your batteries available juice, if it is being charged or discharged and how many Amps (or Watts) are flowing from or into your battery.
Now you can go fancy with Bluetooth or other gimmicks, or you can stick to the basics. You could spend $300 for a display with all bells and whistles, or you can get one for around $30 that basically does the same without the fancy stuff. We decided to buy a Renogy 500A Battery Monitor, it’s not the cheapest available but it always looks good in the motor home when a unit has a well known brand name on it. I also like rectangular devices more than round ones and that particular unit costs less than $100. So – ordered and (hopefully soon) installed.
Everything should arrive here within the next few days. A lot of work is waiting for us. But we’re sure it’s well worth it.
Next up will be the solar array. But one job after the other.
Stay tuned and feel free to ask questions if you like 😀
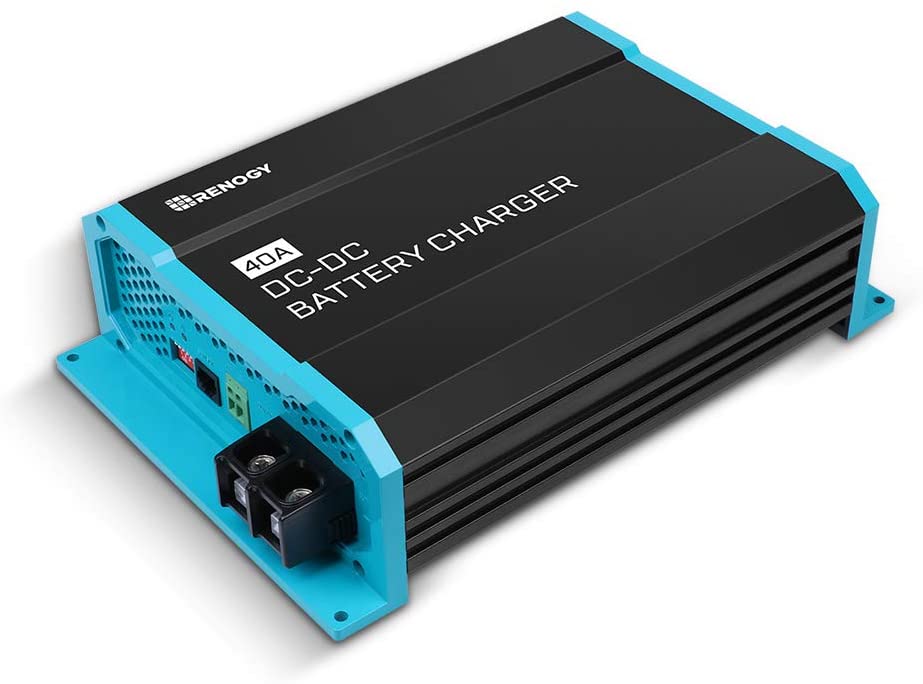
INSTALL 1: Installing DC to DC converter
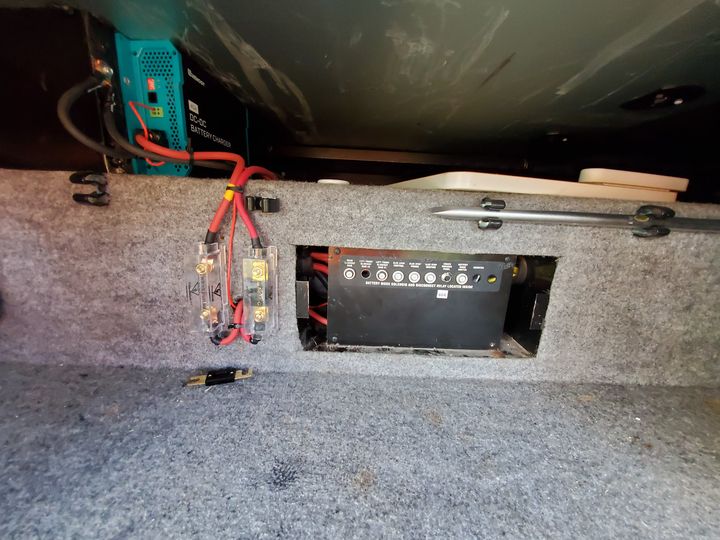
I was somewhat surprised that the Renogy Dc to DC didn’t come with any fuses. So I had to order fuses and fuse holders first. The installation itself wasn’t too difficult because I was able to get access to the house/engine battery cables by connecting from to the emergency solenoid behind the cover. This solenoid can be activated to connect the house batteries to the vehicle battery in order to charge the house batteries (when the motor is running) or to have the house batteries help to start the engine when the engine battery is weak.
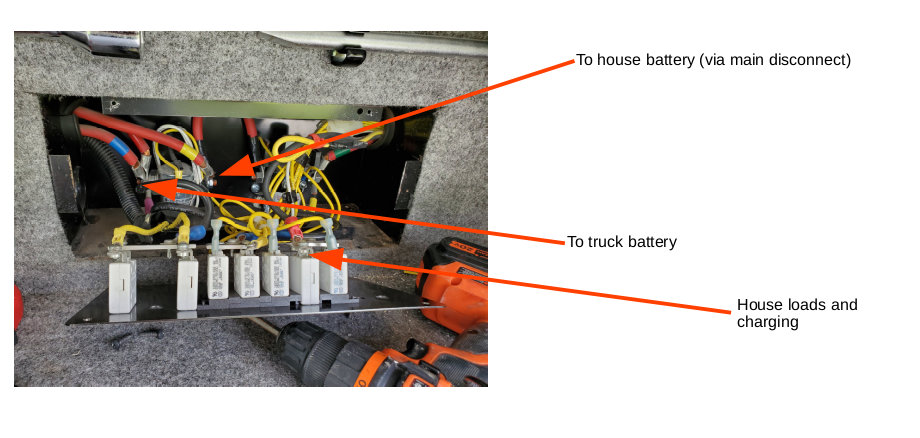
The DC to DC needs an additional 12V “on” signal that can also be taken from the emergency solenoid to turn it on when the ignition is engaged. But the solenoid itself should be disconnected. I am not sure what would happen if the DC to DC positive leads would be shortened. So – the solenoid needs to go or, at the very least, the “engage” wire needs to be taken off.
I took an idea from the YouTube “RV with Tito DIY” channel. He also connected a DC to DC but he wired a switch into the cab allowing him to manually turn the unit on and off. I did it the same way (though mine looks better :D) and I am now able to disconnect the converter if the engine is at idle speed for a long(er) time.
INSTALL 2: Installing the Renogy Battery Monitor
The state of charge of Lithium batteries can’t be easily determined. They don’t change voltage a lot during charge or discharge, so a battery monitor is .. well not required .. but very useful.
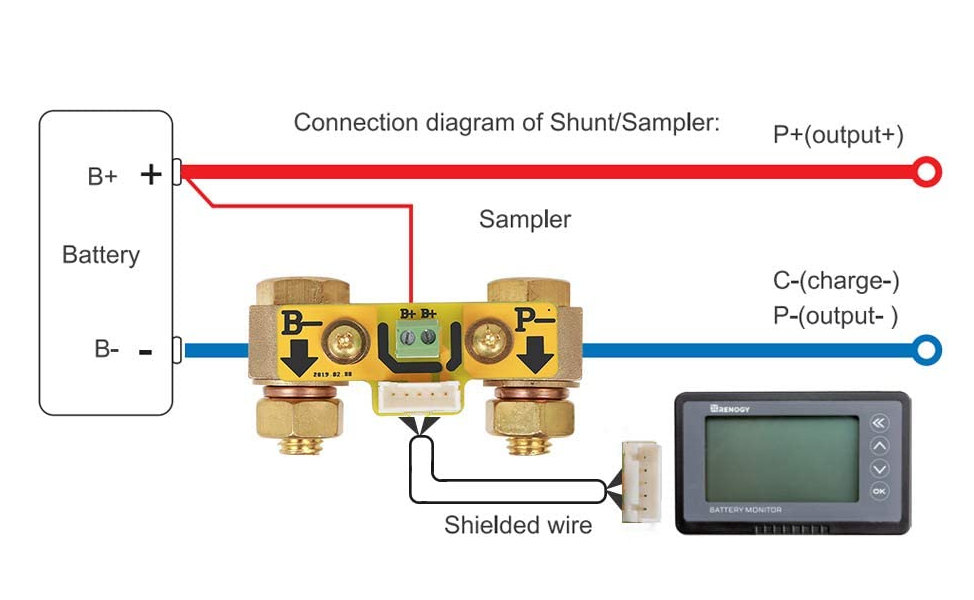
The unit works by measuring how many Amps are being drawn from or put back into the batteries. In order to be able to do that, a shunt needs to be connected into the negative battery side in a way that all inputs or outputs are flowing through so they can be measured. Though I don’t expect to pull more than 150A from my batteries, I had to use the 500A max shunt because the only other alternative would have been a 100A shunt. So – I had to deal with a massive chunk of metal. I already installed a shunt for a cheapo Amp-Meter and it was relatively easy to replace that with this .. heavy thing.
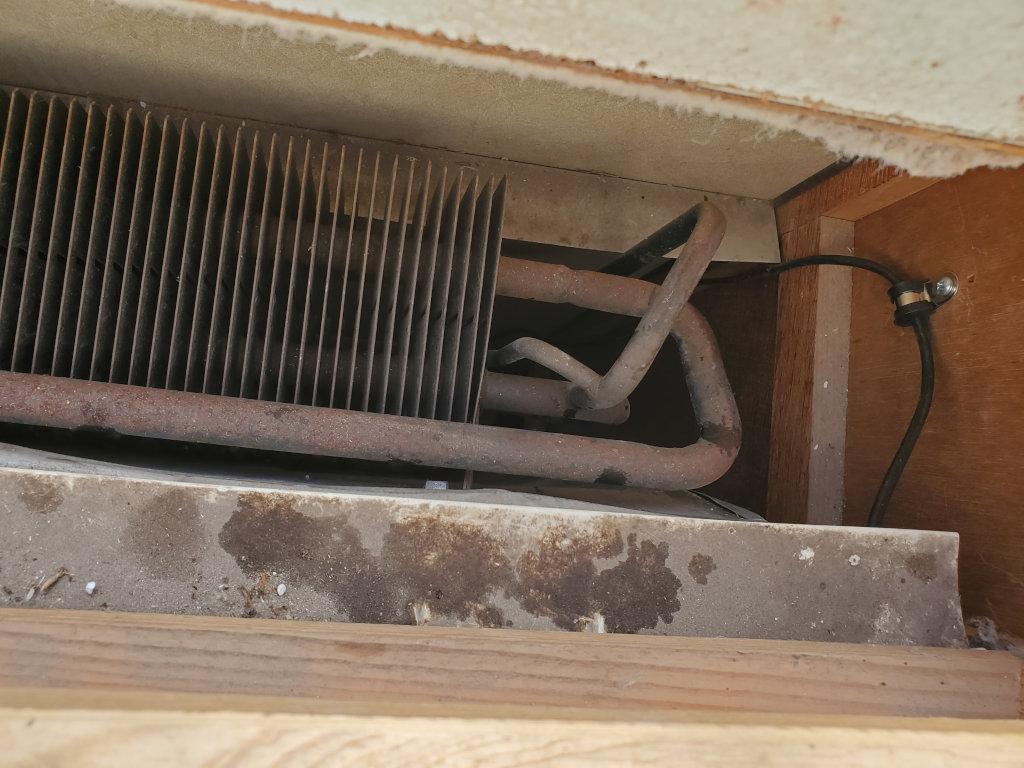
Mounting the display in a good position was a very different problem. The cheapo amp-meter was mounted in a position that was convenient to install but required some serious body twisting to view. In my “Outlook” , the only available space for a nice install was above the fridge. I of course had no idea how to route the control wire from the electronics cabinet (below the fridge) to the display on top of the fridge.
I solicited ideas on Facebook and iRV2.com and someone suggested to try to find a way to run the wire from the front of the fridge to the back and down through the fridge vent. That was easier said than done because the Winnebago plans show two horizontal stabilizer boards on top of the fridge. I opened the fridge vent from the roof, tore the wire-mesh off (it was replaced before I closed off the vent again) and found a wooden frame towards the fridge, unscrewed it, cut my hands from the remaining wire mesh bits and pieces but was rewarded with access to a large opening. Could that be it? I summoned my courage and drilled a hole into the perfectly nice looking front side above my fridge and … was greeted with sun light flickering through the opening I created on the roof.
The rest was easy. There’s so much room up there on top of the fridge that I am starting to day dream about what else could be installed there?

Maybe a video monitor? Weather station? My inverter control is for sure going to move up there.
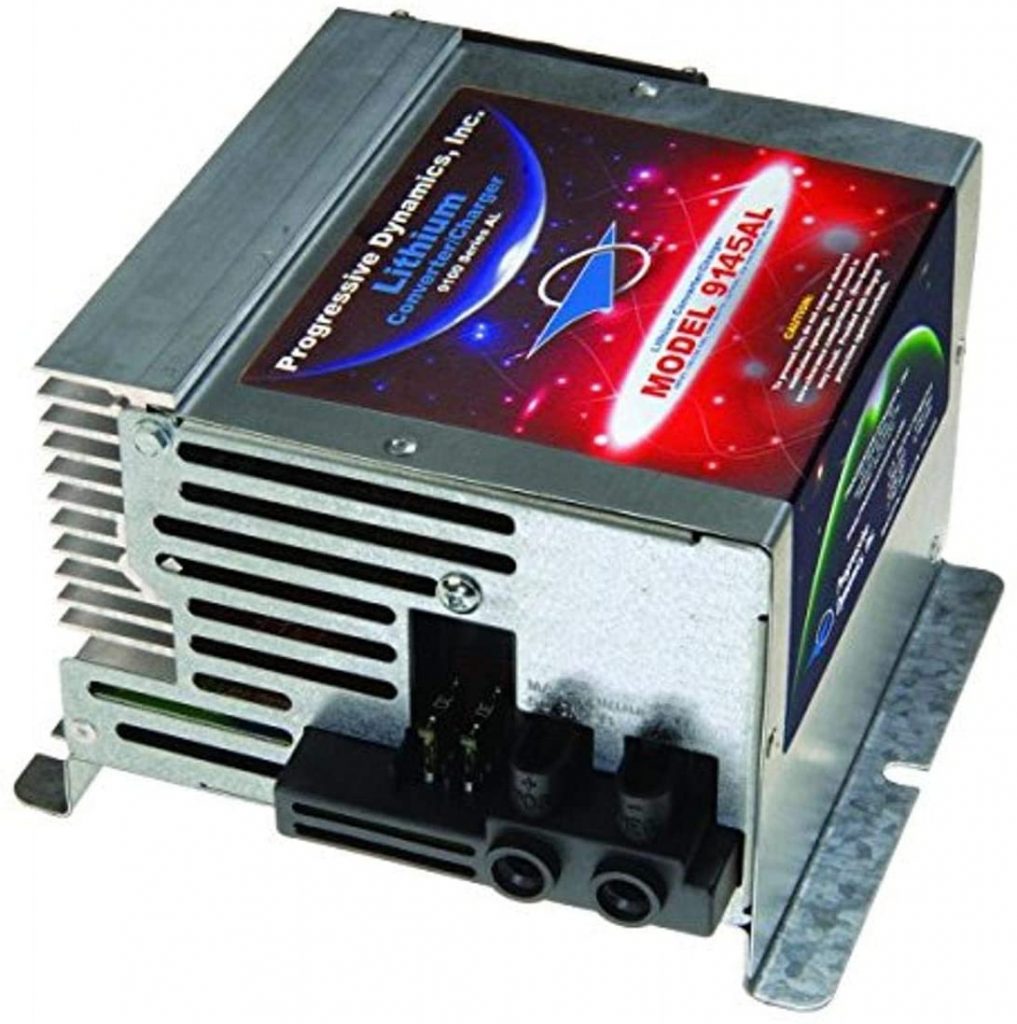
INSTALL 3: Installing the Progressive Dynamics PD9145ALV Lithium Charger
The Progressive Dynamics PD9145ALV installation was straight forward. It has a power plug and the positive / negative 12 V leads that need to be connected to the battery at your 12V DC fuse block.
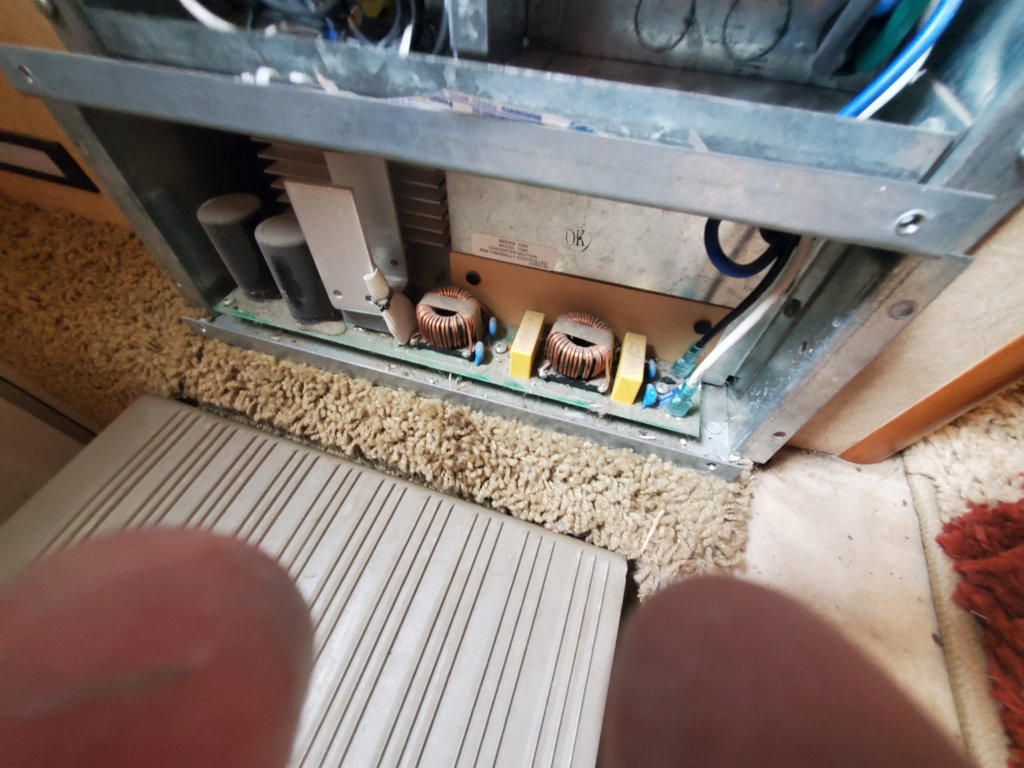
You pretty much remove the old 12V controller/charger and wire the new Lithium unit in it’s place. It was a bit different for me because I already installed an automatic transfer switch (to change from shore-/generator power to inverter and back) and the 120V connection (in my case) has to be made to a fuse in the transfer switch.
Though the new unit looks different, it fits nicely in the space once the old converter is removed. Just remember to mount it fan forward because it will need to expel some heat.
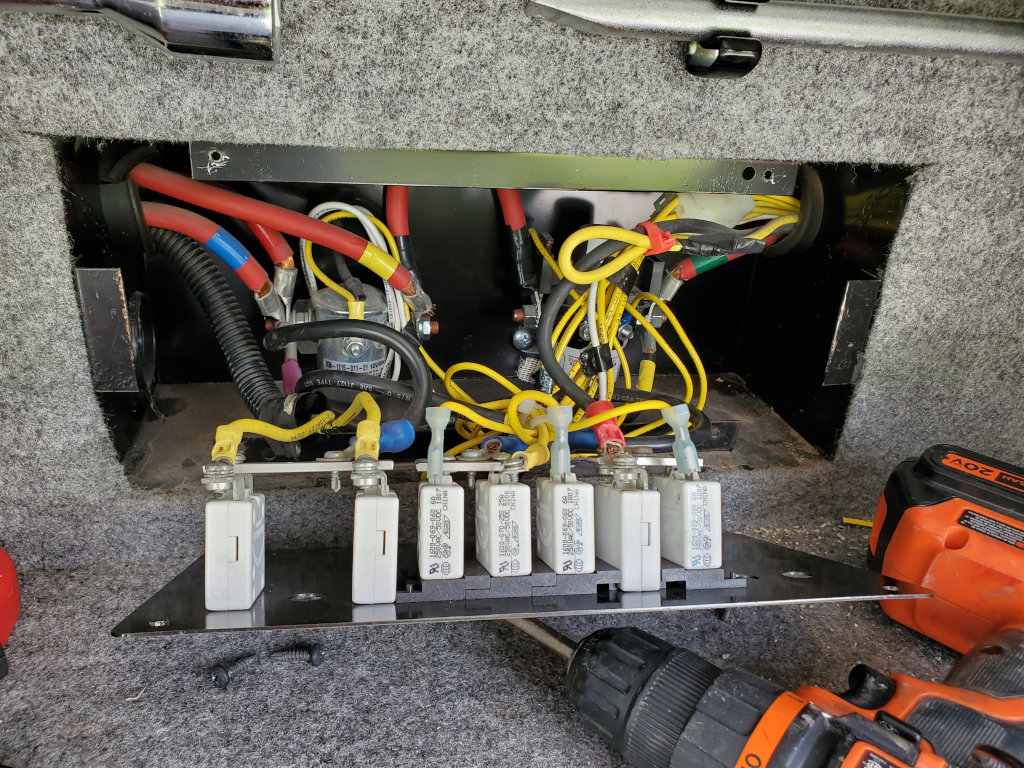
This might also be a good time to replace the old fuse block with a new and updated fuse block.
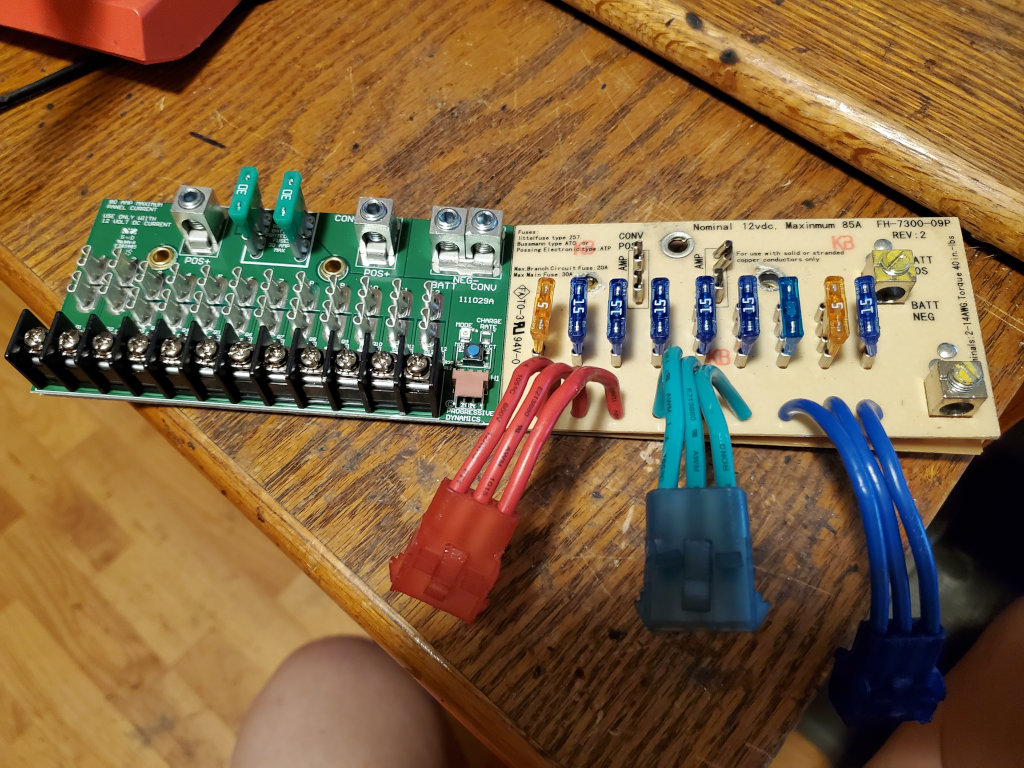
The new fuse block is easy to install, though you need to de-solder the red, green and blue plugs and re-use them on the new board. After that, you can remount it into your distribution box. You now have more fuses (to connect other stuff), it’s easier to connect the main leads to and from the battery and it has fault indicators for blown fuses (a little red led goes off when a fuse is blown).
Final thoughts:
The change / upgrade was a lot of work. Now to the big question: Was it worth it? Well .. even without having the big solar array installed on my roof and using only a small portable 200W array – the answer is: Absolutely.
After an evening and night of usage, including 2 hours of TV or movie watching and having a 120V fan running all night (about 25% to 30% discharged) , the Lithiums are usually fully recharged around 2pm on a sunny day. But even without sun, we could go with our normal routine for 3 or 4 days.
In order to calibrate the battery meter, I had to fully discharge the Battle Born batteries. It took 2 1/2 hours for an inverter powered room heater to make the voltage drop below 12V (at which point I disconnected the room heater) and the batteries were still pushing out Amps.
The batteries charge so much faster, there’s not much voltage drop under load, they don’t care if they are 100% charged or just 40%, they are lighter and they can be charged and discharged for thousands of times.
With our new setup (and the upcoming solar install), energy is no longer an issue when out in the middle of nowhere.
One thought on “Going Lithium and Solar”