Installing Solar
This is part II of our conversion to Lithium and Solar. We first exchanged the old lead/acid batteries with LiFePo4 batteries, replaced all converters and chargers to match our new batteries and finally installed a solar array on our Winnebago Outlook.
After we converted our Winnebago to Lithium, it was time for the next step. Installing solar panels to keep those Lithiums nicely charged. We already had some experience with our Renogy portable 200W array providing a steady flow of Amps on a sunny day, but this of course required the occasional re-positioning of the array and the setup when we parked and dismantling when we broke camp. A wind gust flipped the array over on one of our trips, it didn’t break, but it illustrates the problems with portable systems. We wanted more Amps and more convenience, so we decided to put solar panels on the roof.
Traditional or flat panels ?
Traditional aluminum “framed” panels have a better performance and are mounted in a way that allows air to flow beneath them cooling the module adding even a few percent more efficiency. They also usually have a longer warranty period and are cheaper compared to their flexible counterparts.
Flexible panels are much lighter, extremely flat, very robust and much easier to install. No need to find studs, no need to drill into the roof, just tape them down with Eternabond and you’re done.
But there’s a catch: You can purchase flat panels and, well, flat panels. Early and cheap(er) panels are laminated or sandwiched in PET ( polyethylene terephthalate ) a transparent and robust plastic. However, the lifespan is limited to about 5 years and the plastic cracks easily, especially after having been exposed to UV radiation for a longer period of time.
Modern (and more expensive) flexible panels are sandwiched in ETFE (Ethylene tetrafluoroethylene) which withstands the elements and UV much longer. As an added benefit ETFE is chemically related to “Teflon” , it has a non-stick surface and more or less self cleans itself during a rain shower.
We really REALLY wanted to avoid drilling into our perfectly fine fiberglass roof, so we decided to get flat panels. The search for a deal on ETFE laminated flexible solar panels was on.
We found an interesting solar kit and, after emailing with them and other manufacturer and distributors, we decided to pull the trigger on the ACOPOWER 550Watts Flexible Solar RV Kit on Amazon. The ETFE panels come with a 25-year transferable power output warranty, the modules are made by Sunpower, the MPPT charge controller (trust me: you don’t want cheap and old-fashioned PWM controllers) can deliver up to 40A and their customer support is based in the good old US of A.
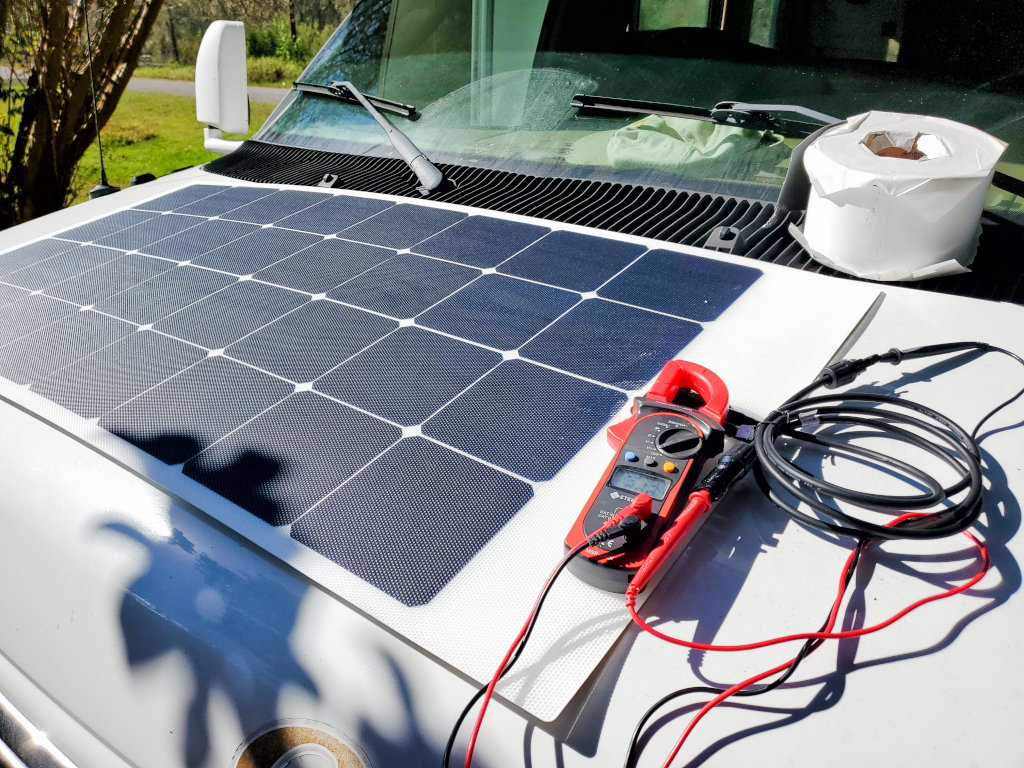
It took just a few days for delivery and they arrived safely triple packed. We carefully unpacked them and measured each of the five modules for voltage. All was well.
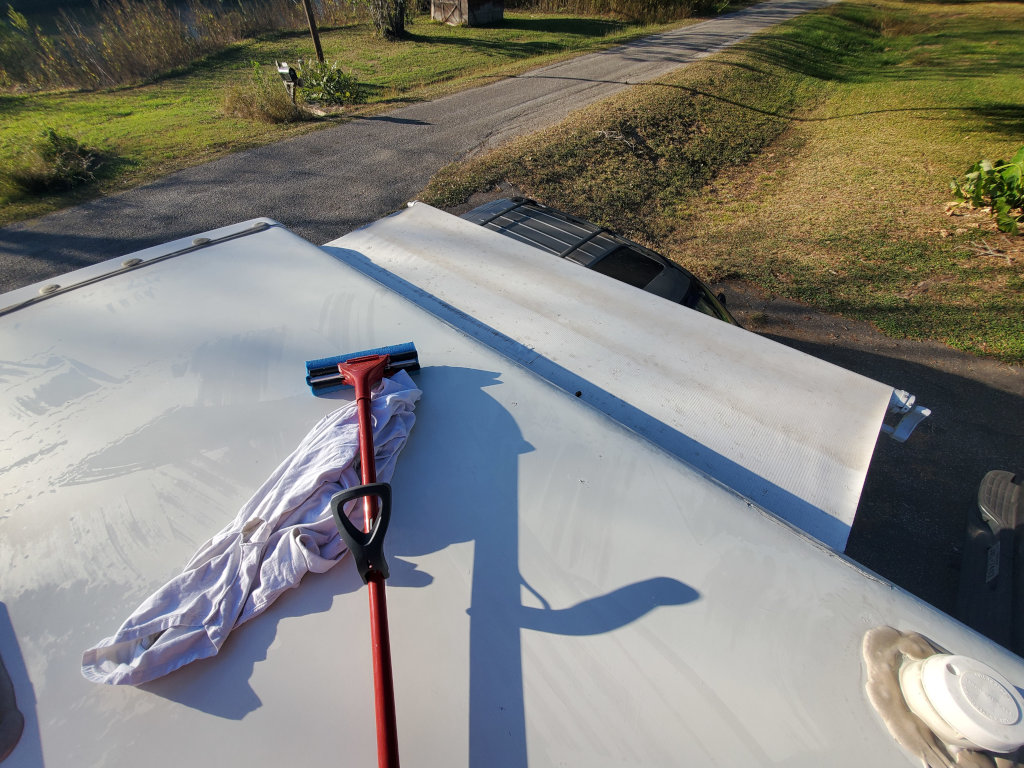
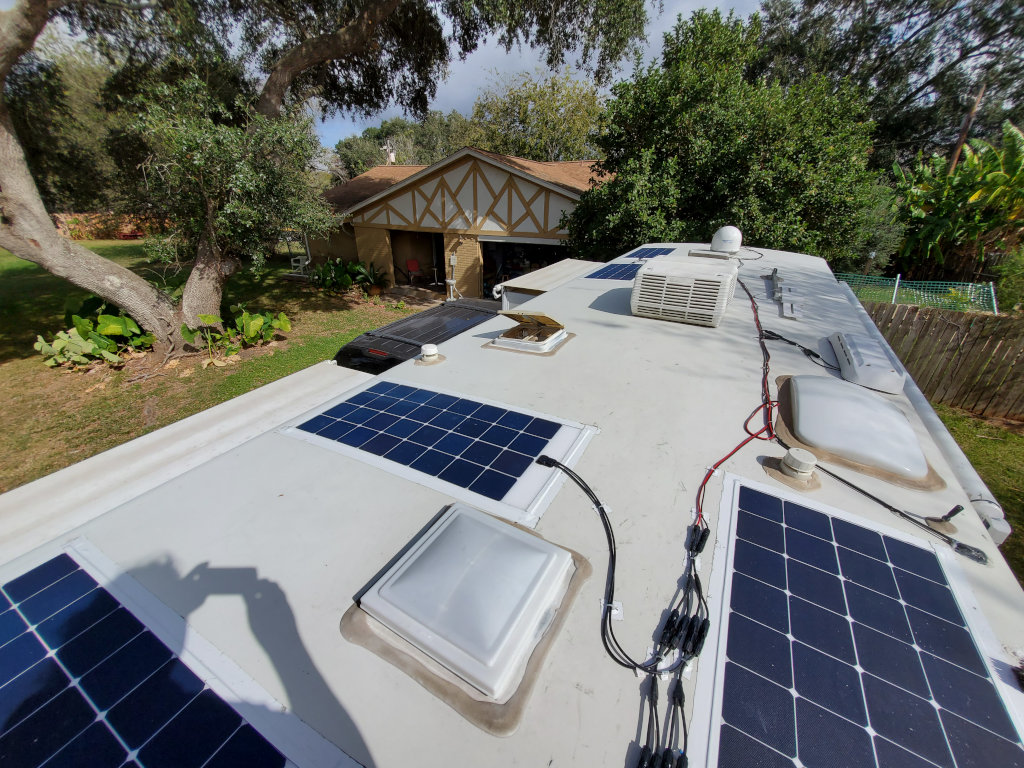
Next step: Cleaning the roof. As we were planning on taping the panels, we needed to make sure the roof was nice and tidy. When everything was dry again, we started to position the panels on the roof. Though there’s plenty of room on a 30ft motor home, we couldn’t find enough space to keep the panels together while avoiding potential shade from the a/c unit or the satellite TV antenna (which we don’t use anyway).
The only way we could do this was to split the panels in a group of two with three panels in the rear and two panels at the front of the roof. That of course made it necessary to create two solar extension cables. This really wasn’t too hard once I figured out which crimped inset goes into what plug. Since the connector clicks into the plug, it’s more or less permanent, even if you got it wrong, or if you forgot the gasket. I needed a few tries and almost ran out of plugs. But I made the two extension cables and climbed back on the roof.
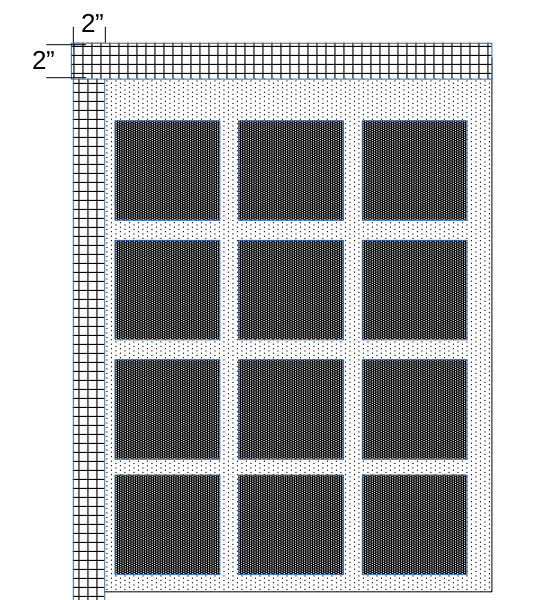
We positioned the panels in the chosen location so that the connectors match up to the Y branch connectors, then cleaned the area to be taped on the panel and the roof again (this time with alcohol) and finally taped the panels down with Eternabond tape. I used 2 inch tape and put it down in a way that about 1 inch holds on to the panel while the remaining tape glues the panel to the roof. I used a roller to ensure a good bond between the tape and the roof and to remove air bubbles and faults.
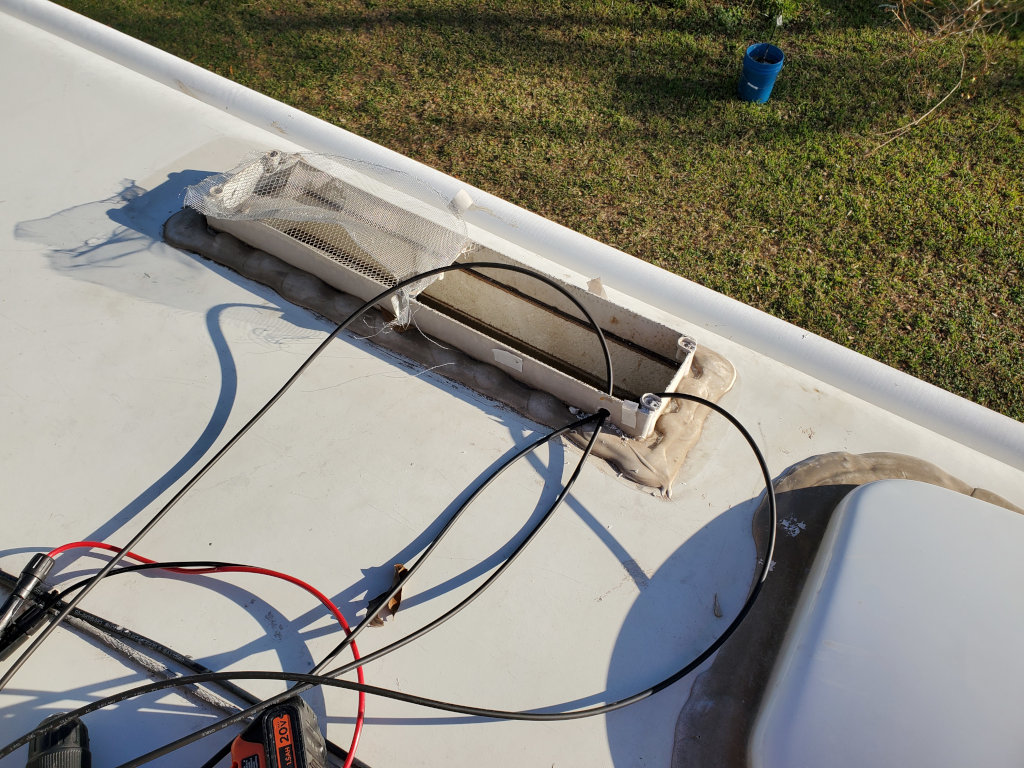
It took about 4 hours to get all panels mounted. We went ahead and connected all y-branch connectors and extension cables, measured the voltage again (all good) but kept the main cable disconnected. We fishtailed the main cable down the fridge vent and from there one more compartment down so the main cable finally ended up and the power distribution box under the fridge.
Though I like the ACOPOWER kit, I am not particularly happy with the provided cables and may even change them in the future. First: It seems they are aluminum. Second: Those are 10 gauge cables. I would have preferred something like 8 gauge copper. And third: I wish they would have marked the main cables (from the panels to the controller) with plus (+) and minus (-).
Fortunately, I have only about a 6ft run from the roof to the charge controller, so the 10 gauge might be ok. I will keep an eye on it.
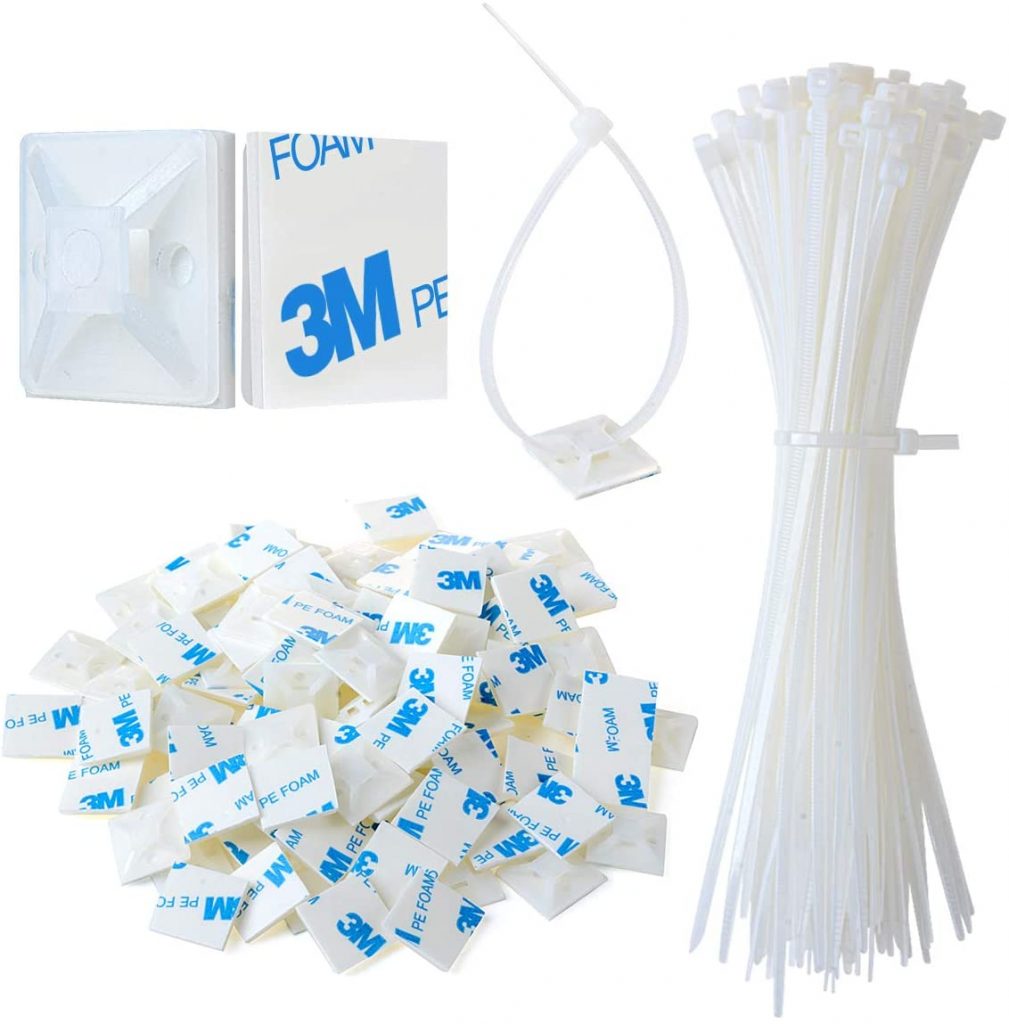
Let me say a few more words about how I attached and secured the cables to the roof. Some people just put a dab of Silicon down and glue the cables, but we wanted to try something new. We ordered Cable Zip Tie Mounts and secured them with a piece of 2×2 inch Eternabond in which I cut a hole in the center. This makes it easy to add or modify the cable / routes or to remove the mount with (relatively) little effort.
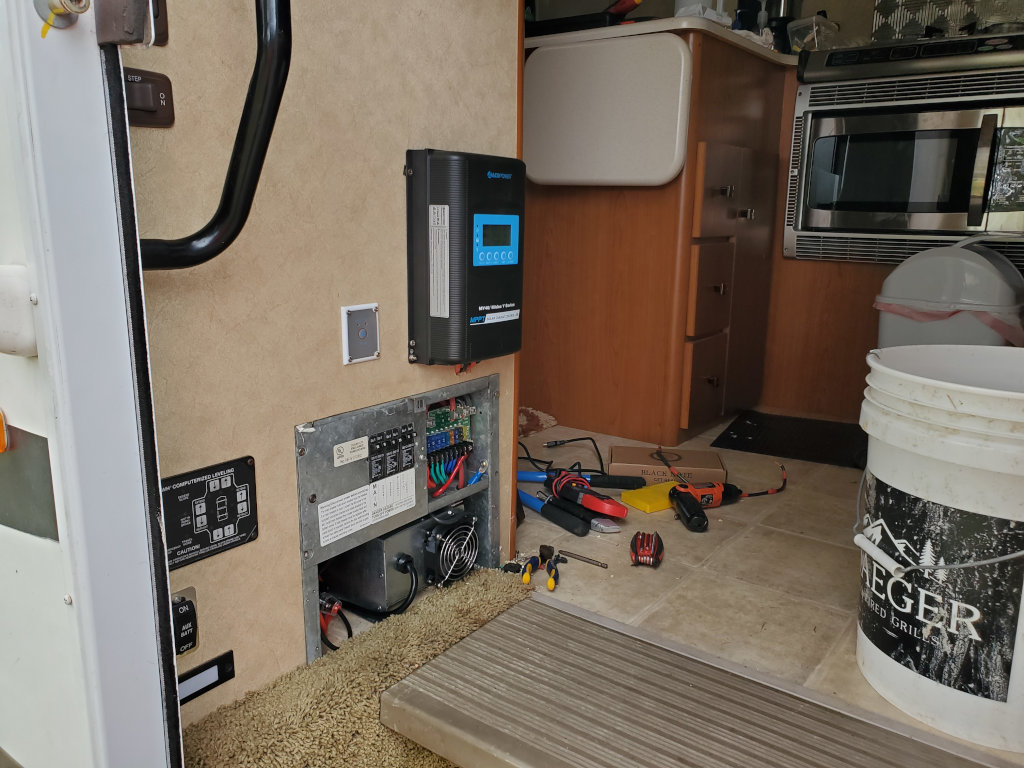
After all the work on the RV over the last 2 weeks, we didn’t have any more strength left to mount the charge controller in some well thought out, hidden location. We already had a few holes in the wall (from previous installations of different stuff), we decided to mount the controller right there. Not a bad location, but also not a perfect spot. Maybe we’ll move it again in the future.
We are now monitoring the solar output. It’s much more interesting than browsing the news or social media nowadays. The RV sits in the drive way and is partly shaded by a tree. It’s the end of November and we have partly cloudy to cloudy skies. So far we have seen peeks around 300W (23A) but I’d say the average is about 9A to 12A. That’s not bad at all.
There was a slight snag though: I couldn’t figure out how to setup the solar charger to Lithium. I emailed customer service and they told me that a little remote controller is required to do this. And that this remote wasn’t part of the package. Huh? Nah .. they shipped it out, free of charge, the same day. We are glad that we made the right choice purchasing our solar stuff from Acopower.
Now – let’s sum up all expenses for the Lithium/Solar conversion and see where we end up:
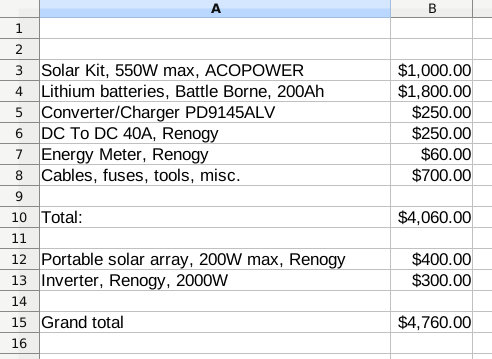
We actually ended under budget. Maybe we should apply for some public position? Anyway .. for around $5,000 we achieved energy independence. Well .. not completely because we still have to rely on the sun to provide those electrons. We can power the coffee maker, the micro wave, the tv and everything else (except the a/c) without having to run the generator and even on less perfect sunny days, are able to recharge the batteries out of “thin air”.
It was a lot of work. But we learned a lot and it was fun. Our “Winnie” is now even more “ours” as we modified it the way we wanted it to be.
Now it’s time to go boondocking and to try how well our setup works. I am optimistic.
You have a wonderful blog. And you did a very professional layout on your work. Thank you for all this information, it is priceless. And you two are making me want to go solar, except I’d need a job to pay for it, nope retirement is meant to relax and learn. ❤❤Thanks again for this blog I love it.
Great blog. Well written. Great pics!